Summertime Saga — All Locations Guide: Where to Go and When
The world is bigger than it looks on first arrival. A lot of areas don’t appear on the map until specific story beats unlock them, and several locations behave completely differently depending on the time of day or how far you are into a character’s route. This guide covers every major area, what you can do there, and when you can actually access it — without walking you through any specific story sequence.
- 01How the Map System Works
- 02Home and Immediate Surroundings
- 03School District
- 04Town Centre
- 05Residential Areas
- 06Outdoor and Nature Areas
- 07Service and Public Locations
- 08Time-Based Location Access
- 09Locations Locked Behind Story Progress
- 10Easily Missed Areas and Hidden Interactions
- 11New Player Locations to Know Early
- 12Best Early Locations to Prioritise
- 13How Locations Connect to Routes
- 14Using the Map Efficiently
How the Map System Works
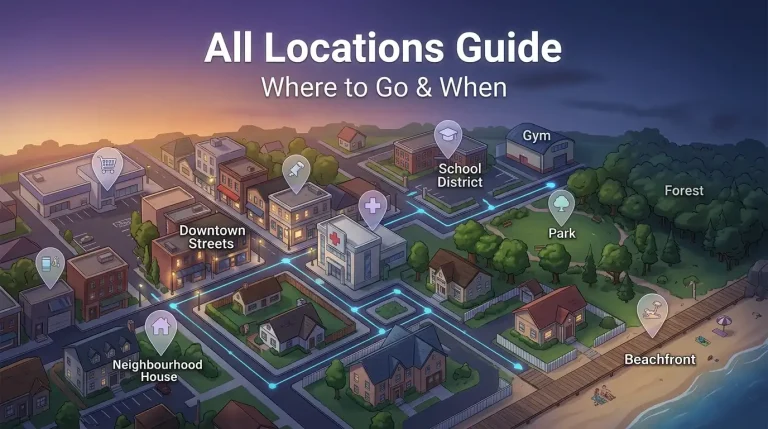
The visual novel uses a hub-based exploration system. The main character’s house acts as your base, and the town map expands outward from there. You navigate by selecting a district on the town map, then picking a specific location within it.
A few things worth knowing early:
- Not every location appears on the map from the start — some unlock after specific conversations or story flags
- Many areas have separate day and night states, with different characters present and different interactions available
- Some locations are only reachable via another location first (the forest, for example, is accessed through the park)
- The in-game clock matters — showing up at the wrong time means an empty area or a locked door
Home and Immediate Surroundings
Main Character’s House
Available from day one, all hours. The house contains several interactable rooms: the bedroom (rest, time skip, computer access), the bathroom, the kitchen, and the basement. The basement becomes significantly more useful mid-game when a specific route unlocks it fully. The computer in the bedroom is used for both story progression and a recurring minigame that generates income.
Neighbour’s House (Diane)
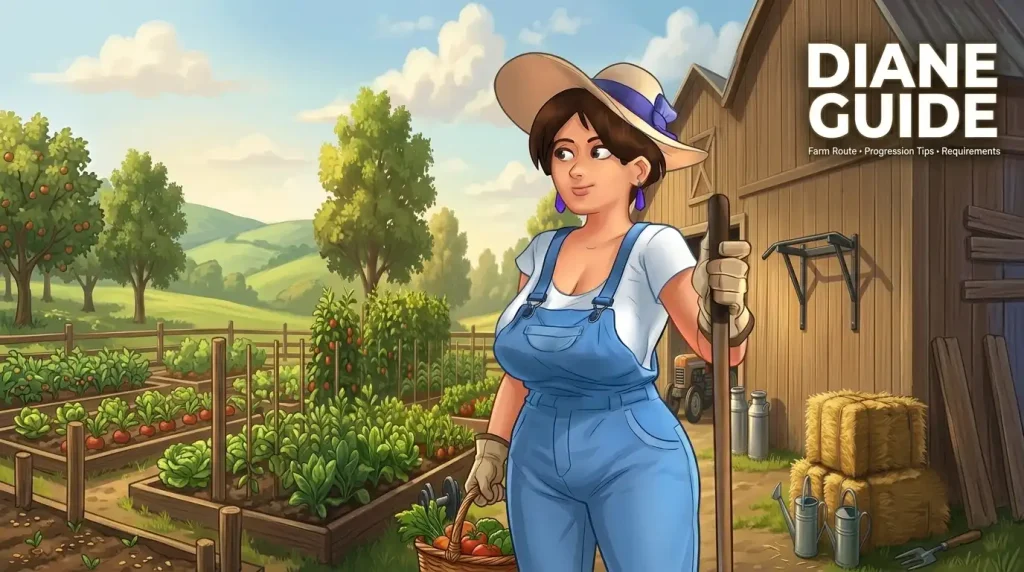
Located directly next door. Accessible early — Diane can usually be found in her garden during the day. The interior unlocks after a few conversations. This area ties into one of the longer early routes and has several return visits required for progression.
Garden / Backyard
Accessible from the house. Becomes relevant once the gardening mechanic is introduced through Diane’s route. Not just a cutscene location — it has an ongoing interactive function once unlocked.
School District
High School — Main Building
One of the most content-dense locations in the route structure. The school is only accessible during school hours — morning and midday time blocks on weekdays. It contains multiple sub-locations, each worth treating as its own interactable space.
- Classroom — stat-building location; attending class raises Intelligence and other stats depending on the subject
- Library — a separate interactable space inside the school with its own character and study functions
- Gym / Locker Room — unlocks during specific routes; has time-specific character appearances
- Principal’s Office — accessed during story beats, not freely
- Cafeteria — primarily a social hub with NPC interaction
- Hallways — several characters can be found here during school hours including Roxxy, Becca, and Missy
School Grounds / Parking Lot
The outdoor area around the school has interactions that don’t occur inside the building. A few specific route moments play out here — easy to miss if you walk straight through to the entrance.
Town Centre
Shopping Mall
A multi-floor location with several distinct sub-areas. The mall is accessible during daytime hours and contains:
- Clothing store — used for purchasing outfits that affect certain interactions
- Grocery / convenience store — item purchasing; some items are route-specific triggers
- Food court — NPC interactions; some character routes pass through here
- Toy store / gift shop — gifts used in relationship routes
Street / Downtown Area
The connecting area between major districts. Several minor characters appear here at different times. A few side interactions are only available by walking through the street rather than fast-travelling directly to a destination.
Church
Accessible from the town area. Becomes relevant for a specific character route and has limited interactivity outside that context — one of the more commonly overlooked locations on early playthroughs.
Residential Areas
Roxxy’s House
Unlocks after initial school interactions with Roxxy. The interior — particularly the garage — becomes a key location for her route.
Visiting at different times of day produces different characters and interactions. The garage specifically is only relevant in the evening on certain route flags — players who only visit during the day will find it inactive and assume there’s nothing there.
Jenny’s House / Aunt’s House
Two separate residential locations tied to different characters. Both become accessible through route-specific story triggers rather than map exploration. Jenny’s room and the aunt’s house both have multiple interactable areas that evolve as routes progress.
Erik’s House
Your in-game best friend’s location. Accessible relatively early. Used for a few recurring interactions and serves as a natural social visit point during early game. Some route content specific to Erik’s storyline plays out here across multiple sessions.
Debbie’s Room (within the main house)
Worth treating as its own location. The interactions available here change significantly as her route progresses, and several players miss content because they don’t revisit once it unlocks. Check in at different times of day — morning and evening states are different.
Outdoor and Nature Areas
Park
Accessible from the town map. The park is a transitional area — it contains its own interactions but also serves as the entry point to the forest. Several characters can be found here at specific times, and it’s one of the few outdoor areas with both daytime and evening content.
Forest
Accessed through the park. The forest is a progress-locked location — it doesn’t become meaningful until specific story flags, at which point it opens up substantially. It has hidden interaction points that are easy to walk past, and certain events here only trigger at night. Revisiting after relevant route progress is necessary; arriving too early produces almost nothing.
Beach
One of the larger outdoor areas. The beach has morning, afternoon, and evening states with different characters present at each time. During the day it’s primarily a social area with several NPCs. Evening beach content is route-specific and tied to particular character paths. It’s also a location that keeps accumulating new interactions as more of the current build opens up — worth revisiting regularly.
Fishing Spot / Pier
A quieter area connected to the beach district. The fishing mechanic here is one of the income-generating systems in early game. Also a setting for a few low-key character interactions that players on specific routes need to visit.
Farm
The farm is one of the most important progression locations outside the main town. It introduces Strength-based tasks, recurring work activities, and a character route that gradually expands as new requirements are met. Players spending time here often discover that progression depends as much on stats and timing as it does on simply visiting the location. Our Diane guide explains how the farm route works, the most common progression blockers, and why certain events seem to stop advancing.
Service and Public Locations
Hospital
Accessible from the town map. Becomes relevant during specific story sequences and is the primary setting for the nurse route. The interior includes a reception area and a back office/patient room that unlocks during progression. Many players visit once for a story beat and forget to return — the nurse’s route requires multiple visits at different times of day.
Police Station
Appears on the map after a specific early-game trigger. Limited general interactivity, but becomes a setting for a few route-specific scenes. One character associated with this location has interactions both inside the station and in other areas of the world map.
Gym
A separate location distinct from the school’s gym. Accessible during daytime. Primarily used for raising the Strength stat through a workout minigame. Several characters appear here at specific times, and a couple of routes have scenes that play out during gym visits. Strength gates certain route content, making this location relevant well beyond early exploration.
Library (Public)
Separate from the school library and serving a different function. The public library is an Intelligence stat-building location and the setting for a specific character route. Visiting during opening hours gives access to study interactions. Worth distinguishing from the in-school library — they’re used by different routes.
Tattoo Parlour / Art Studio
Opens later in the game, tied to a specific character route. Limited interaction outside that context but becomes a setting for recurring visits once the relevant route is active.
Time-Based Location Access
A lot of players think a route is bugged when the real issue is simply visiting the correct location at the wrong time block. This table covers the key time-gated areas:
| Location | Morning | Afternoon / Evening | Night |
|---|---|---|---|
| School | Open, most characters present | Closed (locked gate) | Closed |
| Beach | Open, daytime NPCs | Open, different characters | Route-specific content only |
| Mall | Open | Open | Closed |
| Gym | Open | Open | Closed |
| Forest | Limited interaction | Some content | Route-specific events unlock here |
| Park | Open, daytime characters | Different NPCs | Limited — a few specific events |
| Hospital | Open | Open | Closed to general access |
| Church | Open (services) | Limited | Closed |
| Neighbour’s House | Garden access | Interior access | Route-specific only |
For a structured view of which routes to unlock in which order, the relationship progression guide covers sequencing in detail.
Locations Locked Behind Story Progress
Some areas don’t appear on the map at all until specific story flags are hit. These are the main ones that cause confusion:
- Forest — only becomes a meaningful destination after early park interactions advance
- Police Station interior — requires a particular story event before the interior becomes accessible
- Basement (home) — present from the start but locked; requires specific route progress to open
- Tattoo Parlour — appears on the map only after a character route reaches a certain point
- Roxxy’s Garage — the garage section of her house requires advancing her route first
- Aunt’s House interior — unlocks through story, not available on first visit to the area
If a location you’ve read about doesn’t appear on your map yet, story progression in the right character route is almost always the unlock trigger.
Easily Missed Areas and Hidden Interactions
A few locations and interactions get missed by most players on a first run:
School roof — reachable from inside the school during specific story beats; has a couple of interactions tied to it that aren’t flagged anywhere obvious
Beach cabin / changing area — a sub-location of the beach that becomes active during a specific route; easy to overlook if you’re only visiting the main beach area
Street at night — the downtown street area has a small set of night-only NPC appearances that most players never see
Park bench interactions — certain characters have bench-specific dialogue that doesn’t trigger by clicking on them directly; interacting with the bench itself is the trigger
Home computer evening content — the computer in the bedroom has different available interactions in the evening versus daytime; worth checking both
Fishing pier at dawn — one specific character interaction only appears at the earliest available time slot; players who time-skip past morning miss it entirely
For a broader catalogue of missable content, the hidden event guide covers these interactions alongside others tied to specific route conditions.
New Player Locations to Know Early
A few areas consistently trip up first-time players before they’ve learned how the map system behaves:
- The park → forest entrance — players looking for forest content go directly to the world map and can’t find it. The forest isn’t a direct map destination — you enter it through the park. Visit the park first, then look for the forest path within it.
- School timing — showing up at the school in the afternoon or on a weekend produces nothing. The school is a morning-only location on weekdays. New players often burn time trying to find school-based characters who simply aren’t there outside those hours.
- Evening-only interactions at home — several interactions with Debbie and in the bedroom only appear in the evening. Players who only visit in the morning see a much smaller set of options and assume those interactions don’t exist yet.
- The gym vs school gym — two separate locations with different functions. The standalone gym on the town map builds Strength. The school gym is accessed through the school building and is route-specific. Confusing the two causes players to miss stat-building time early on.
- Diane’s garden timing — Diane is in her garden during daytime. Players who visit in the evening find no one there and assume the route isn’t active. The interior of her house opens up later — the garden is the starting point.
Best Early Locations to Prioritise
If you’re in the first few in-game days and not sure where to spend your time, these locations give the most return early on:
How Locations Connect to Routes
Most character routes are tied to specific locations that require multiple return visits. Understanding which character lives or works where saves a lot of wandering:
Route planning becomes much smoother once you know which characters are location-anchored versus which ones move around the world map. If a route isn’t advancing, the most common reason is visiting the right character at the wrong location or wrong time. For a structured view of which routes to run in which order, the relationship progression guide covers sequencing in detail.
The hidden event guide covers missable interactions alongside others tied to specific route conditions — a useful sanity check on a second playthrough.
Using the Map Efficiently
Time-skip from the bedroom rather than wandering — if a location is closed or a character isn’t present, skipping time is faster than exploring empty areas
Check multiple sub-areas within a location — the beach, school, and mall all have spots that are easy to miss if you only click the first available option
Some story flags only trigger on re-entry — leaving and re-entering a location can advance a conversation that seemed stuck
The town map doesn’t always show all available destinations — some areas appear only as sub-options once you’re already inside a district
For players working through the full story, the full progression guide links location visits to specific story beats — useful when you need to confirm whether you’ve missed a location trigger or just haven’t hit the right story flag yet.
Additional gameplay resources and the latest version content are available through the broader gameplay resources hub.